laptop_mac
macOS (Apple Silicon)
Latest version 0.0.1Minimum supported 0.0.1
시점 이동기능을 추가해서 프롬프트 작성을 더욱 용이하게 만들었습니다.
커버 파일럿
Optimized YouTube Thumbnail Maker
one-time payment
keyLicense key required
The installer is public. Buy a license on the product page, then activate the app after launch.
Latest Public Builds
Download the installer directly. You'll still need a valid license key after the app launches.
시점 이동기능을 추가해서 프롬프트 작성을 더욱 용이하게 만들었습니다.
시점 이동기능을 추가해서 프롬프트 작성을 더욱 용이하게 만들었습니다.
What is your biggest struggle as a YouTuber? Is it finding content ideas? Recording? Editing? For many creators, the most challenging part is the "packaging"—designing compelling visuals like thumbnails that capture attention.
You may have tried using AI or automated tools (like Claude Code), but there's often that last 2% missing. You find yourself wishing, "I want this specific text to be red," or "I wish the title was placed at the top."
This tool was created to solve that exact frustration. Here is how you can use it to get precise control over your branding visuals.
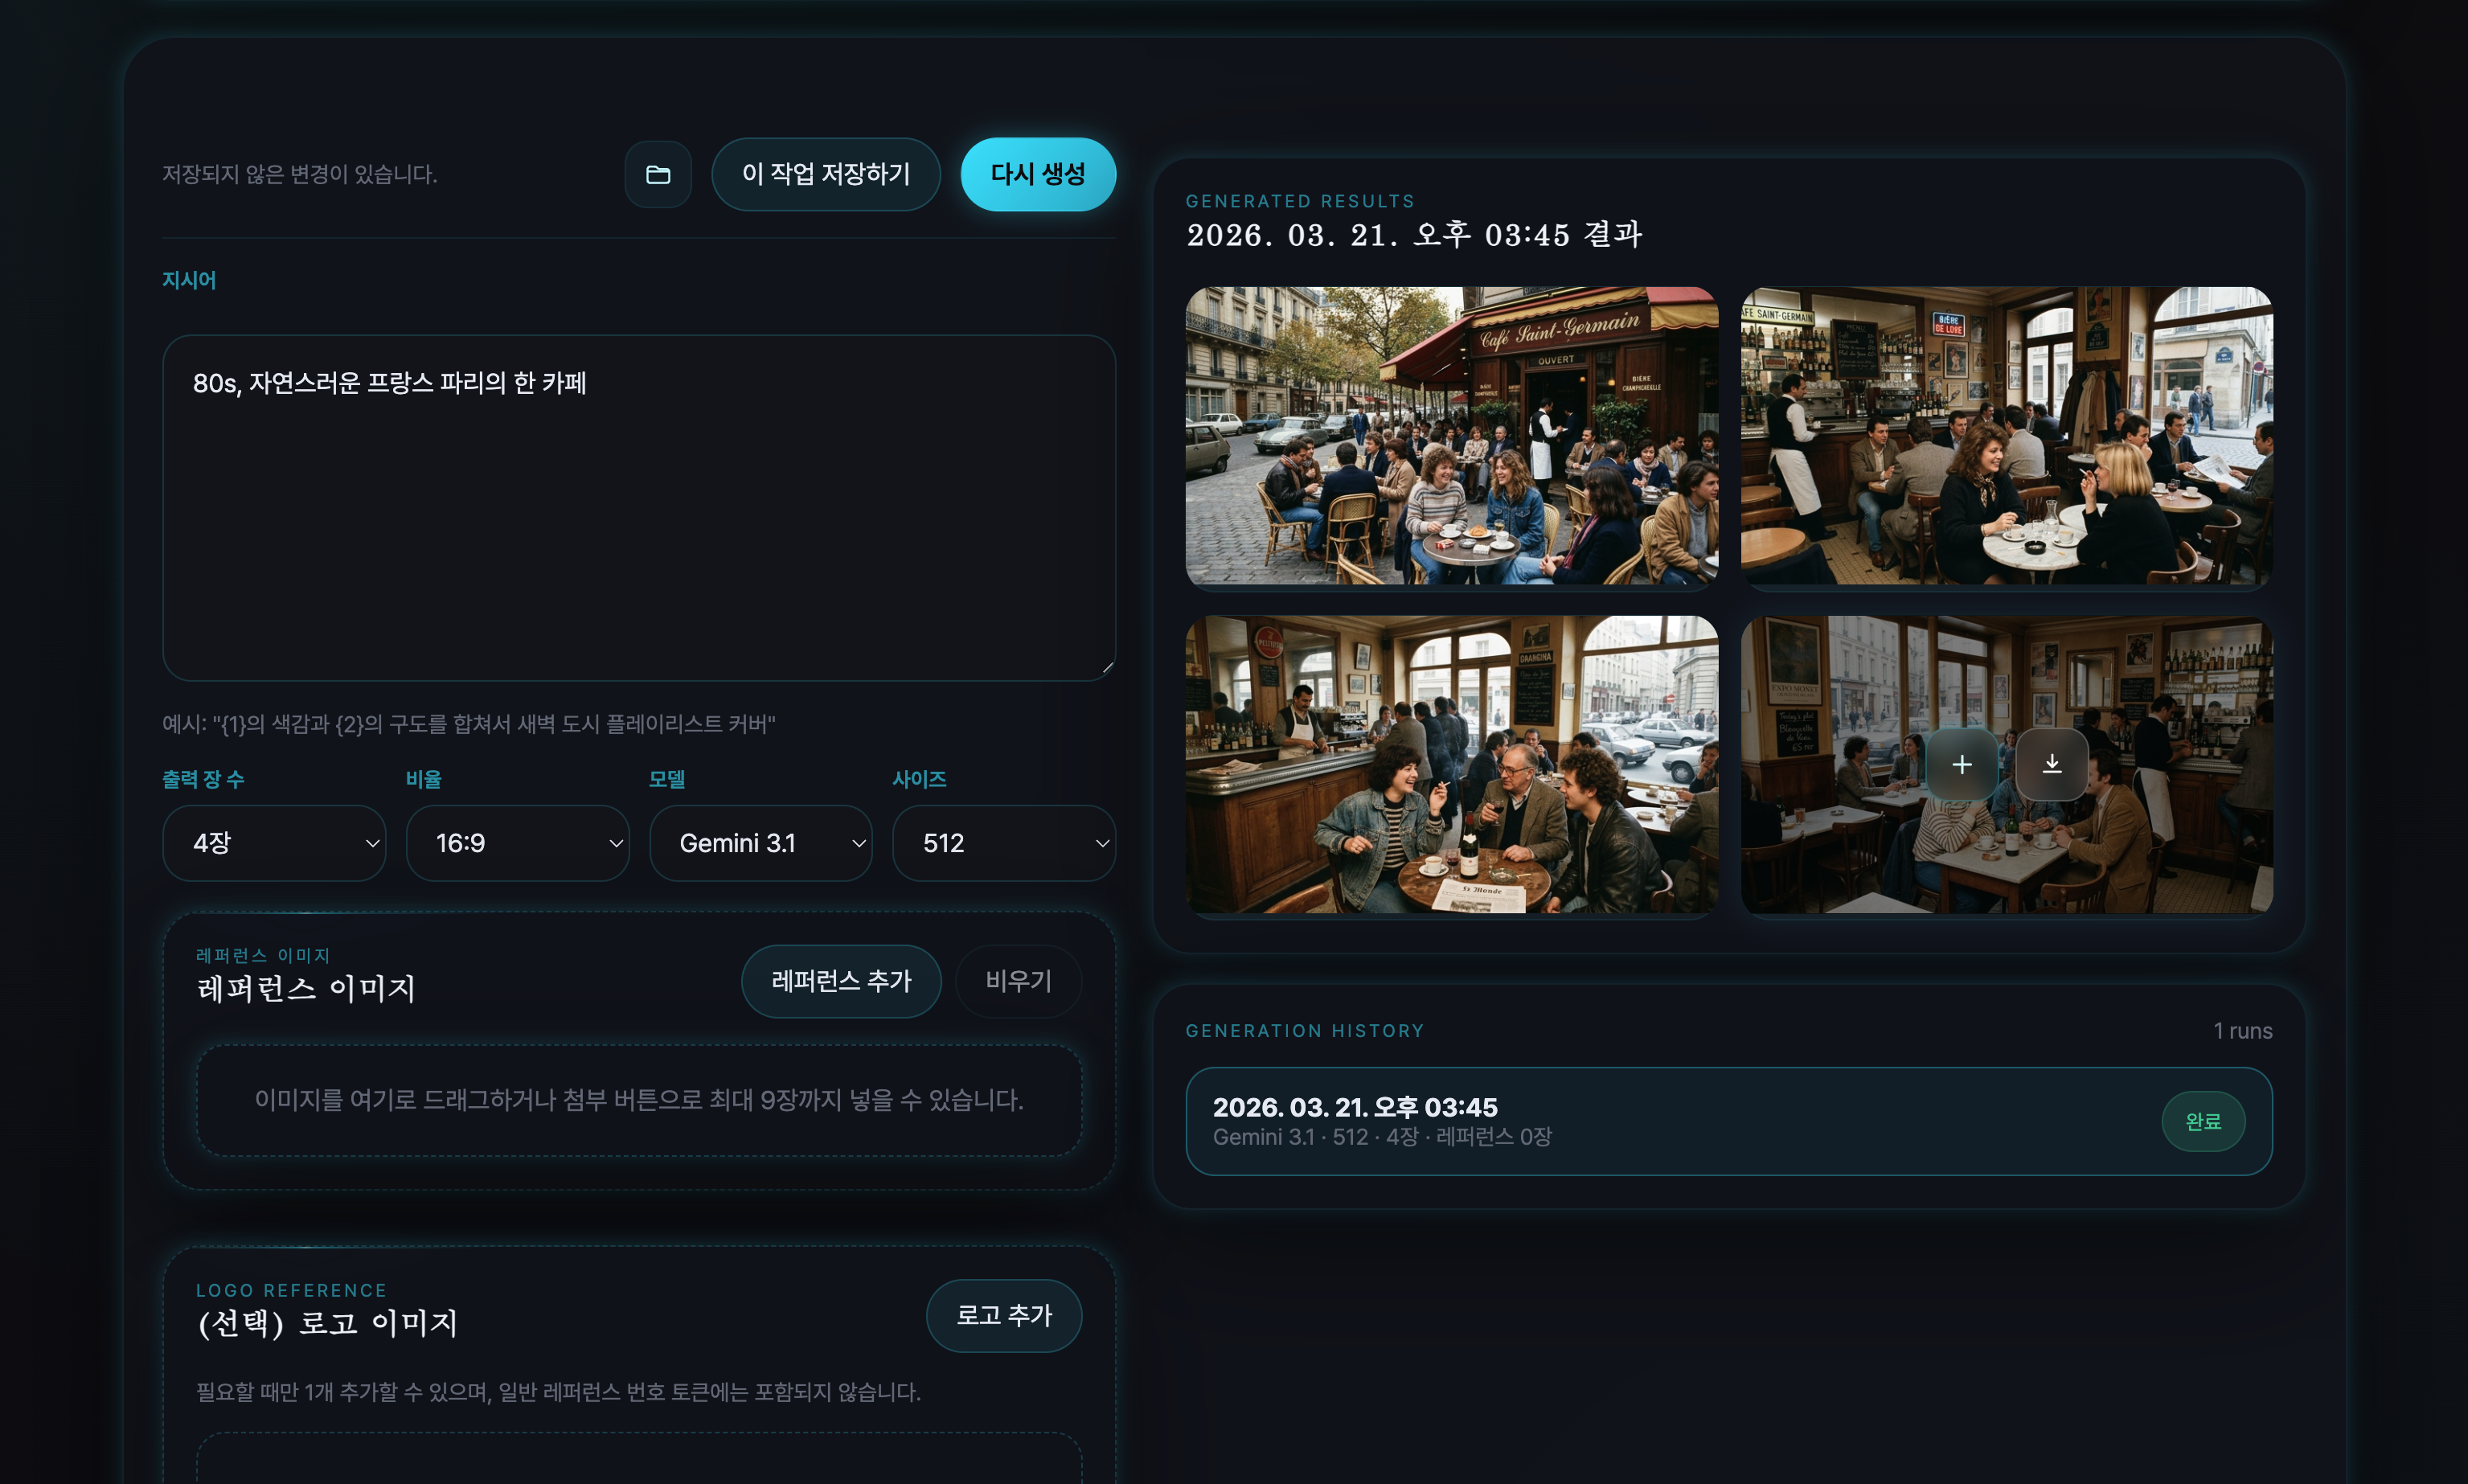
Define Your Vibe: Start by inputting a prompt requesting a thumbnail that matches the specific atmosphere and style you want for your video.
Add References: Upload reference images that reflect the general visual style you are aiming for.
Click Generate: Press the 'Generate' button to create your initial set of images.
Review Results: Examine the generated images.
Download: Download any images that you are satisfied with.
Refine with Generated Styles: Identify the generated image that most closely matches your expected style. Add that specific image into your references. This helps the AI learn and reinforce your preferences.
Clean Up References: Organize and remove any less relevant reference images to maintain focus.
Click Generate Again: Press 'Generate' again to build upon this more focused style.
Review Updated Results: Check the new batch of images.
When you have an image you like but need specific, micro-adjustments (like text color or position):
Click 'Instruct': In the top right corner of the tool, click the 'Instruct' (or Direct Editing) button.
Highlight the Target: Directly mark or paint over the specific area on the image that you wish to change.
Provide Specific Instructions: Write clear, detailed instructions for the marked area. (e.g., "Change the color of the text here to vibrant red and move it to the top center of the image").
Regenerate: Click the 'Generate' button one final time to apply these precise edits and achieve your perfect visual.